Saturday, September 30, 2017

Scranton Small Scales Houseparty
A NAME houseparty is definitely a must for your mini bucket list. Of course if you have already been to a houseparty then it is the next houseparty that needs to be on your bucket list. 
Rest up first because it is a hectic week. 
We arrived Wednesday evening and it was great to see friends in the registration line. A few witches were in the crowd and I mean that in the best possible way.  With the theme of The Legend of Sleepy Hollow there were so many ideas for costumes and hats and t- shirts that very few waited for just the usual costume party on Saturday to dress up. Even the hotel room doors were decorated and the hotel staff really enjoyed that. The eventual winner was just down the hall from me. I should have taken a photo but there was so much going on I lost track. 
There was a good Irish pub next door so that was an easy choice for dinner Wednesday. 
I was giving a luncheon talk and had shipped my luncheon gifts to Fern who generously offered to bring them   But I could only ship them unassembled so I spent a late night trying to assemble as many as possible. 

Thursday I taught a Pre convention Workshop. Witch Croft. This is a little inside outside building with a witch hat roofed bay window. We did some aged paint techniques and a very messy but fun technique for making vines. It is sometimes nice to do something crafty that doesn't require a trip to the local craft shop first. These are done with glue and paper towel   The Paperclay cobblestones and slate floors  really needed to dry overnight but at least the first coat of colour wash could be added.  I had a great group in class and I think everyone was pleased with their Project. 


There was a bit of time in the schedule so Gary and Janet and I walked to the seafood restaurant everyone had been talking about. It was long walk and I was a bit late getting back for the evening workshop. The meal and the company was worth the delay. It is so hard to find time during a Houseparty to really catch up with friends. 
Ruth and Dan Stewart designed the Thursday night project. It was an intriguing open Sleepy Hollow book and featured a bridge over a rock lined stream leading to a coveted bridge emerging from the pages of the book. Creepy gnarled trees curled over the scene. There was a lot of intense crafting and a good supply of cookies and coffee to keep everyone going. 


Friday morning there were more workshops but I spent the morning assembling the last of my luncheon gifts. I did drop in for a minute to see Sally Manwell's workshop and came away with a couple of neat tips for making magic books for the Wandlyn Way. 
And then it was time for the opening luncheon. THe tble centrepieces were excellent. A large black lantern with a spooky little cottage. Each one was a bit different. There was a lot of back chat over who would take our table's centre piece home but of course it was entirely out of our hands and in the final draw on Sunday it was not me. Sigh!
Each meal features a souvenir and this one was a open cabinet with shelves that was shaped like a haunted tree made by Taryn and Scott Reisse. A larger base and accessories were an added gift I think from the committee but with all that was going on it was hard to keep track. 
The sales room opened for the afternoon and so were the hospitality and exhibit rooms and the display of Houseparty helpers. It was hard to choose which ones to put my tickets in. Sad to say none of mine were winning tickets. 
Friday night the round table kits went on sale. I had promised myself that I would be good and not buy too many. Then I saw the samples and from the comments I wasn't the only one who threw those same good intentions out the window. The kits were all excellent. Many of them sold out so hopefully they will all be offered again in the NAME Gazette.

The exhibit room had a lot of Halloween themed exhibits and headless horsemen. This one by Terry Unnold showcases figures by Cat Wingler.

Terry Maxwell displayed her Violin Case Speakeasy from the Greenville Houseparty.  And her C'est La Vie, which she transformed into a very upscale dress shop.


Debbie Columbo's lovely 1/2 scale Victorian rooms were filled with detail; including a cook who just may be sampling the cooking wine. 


All the exhibits were so well done but I  have to confess my favorite was Nancy LaChiusa's  1/4 scale Hungerford Manor.
 I would have chosen it even if it wasn't a Petworth Miniatures kit.   Honest!!
She did a wonderful job and made it uniquely her own with brocade walls and a rearrangement of the original furniture. 


More workshops on Saturday morning and then the theme luncheons. 

I had never had a chance to even go to one before so giving a luncheon talk was certainly jumping into the deep end. Mind you I can babble about miniatures for hours so it was more a case of stopping in time. Lunch was a really good soup and chicken Caesar and lemon cake but you can't eat and talk  so I didn't get a chance to really enjoy the food. Adding Spooky Special Effects to a mini scene with Evans Designs LEDs can be really easy or you can make it more challenging by adding effects such as Pepper's ghost. It was fun to try to think up different effects and include samples in the display. I'll add a new blog later with photos of the display. The comments after were very encouraging so I think everyone enjoyed the theme.
And the as sales room was open again in the afternoon I was off right after lunch to the sales room. There was a silent auction going on but I missed that. 
Saturday evening was the costume banquet and I was so busy looking at the costumes that I forgot to take photos. There were a couple of Headless Horsemen, a really nice Werewolf, lots of Witches, Mummys, Ghosts, and Vampires. People riding down in the elevator with us were either a bit worried about whether we had escaped from some local sanatorium or trying not to be rude and laugh. A few looked disappointed that they couldn't get off at the Convention level with us. Needless to say we were all a bit of a ham.
Dinner was long and loud and totally rowdy. The Houseparty Helpers were drawn amid cheers and groans. The table gifts and exchange gifts were handed out and they were all beautiful. I can't thank my table mates enough and as soon as I got home they were added to my witch's house. 

Sunday started with the final brunch. The centrepieces were drawn for. I didn't win. And the extra ones were auctioned off. Bidding was fierce and NAME certainly benefited from the competition. A final bow from the committee who did a truly outstanding job and the only thing left to so was return to the sales room. All the last minute purchases and packing and everyone started to disappear. It was one of the best Houseparties I have been to. But then I think I said that about Greenville and Portland too. Really, miniatures, friends, fun and a visit to an interesting new place, how can you miss. If a Houseparty isn't on your bucket list add it now.

I'm home, unpacked (well nearly) and getting ready for the next convention. The Ontario Miniature Gathering is a smaller version of a Houseparty with all the same fun and excitement and as chair I still have much to do before next April but my committee has everything well in hand. 
Our theme is A Gathering of the Clans and Scotland offers so many ideas that we have had as much fun organizing the event as you will have attending. It is being held in the beautiful 1000 Islands region on April 20-22 , 2018.
 The webite is now up with registration forms     www.minisgathering.ca   
 If you are coming from the US it is only 2 hours drive from Syracuse airport, straight up HWY 81 and only about a mile from the border on the Canadian side. 
Don't forget your passport. See you there.


Wednesday, June 28, 2017

Kensington Dollhouse Festival

The Kensington Show is always a special and this year was no exception. It is simply a treat to wander through the aisles and sigh over the marvelous items available. With so many things to grab your attention it is hard to complete one  continuous circuit of the show and not get side tracked and end up darting from aisle to aisle as some new treasure grabs your eye. 
The show is on 3 levels  and unfortunately the main elevator was unexpectedly  out of commission. An alternative was available and didn't stop the committed miniaturists from making their way to all the floors. 

I took the photos before the show opened so you could see some of the tables. After that it was too crowded to see more than people's heads.

The list of dealers reads like a whos who of miniatures and are far to numerous to list here.
Rogers and Mulvaney displayed  their usual high level of craftsmanship with a lovely French salon. Although applying the term 'usual' to their creations is definitely an oxymoron. 


Miyuki Porcelain is always a show stopper as is Vitreus Ignis blown glass.


And of course there was the Petworth Miniatures stall.😉


The PIMA Awards have become an important part of Kensington.
They showcase the best of artisan miniatures and include some unique pieces.
 This year's  1st place went to Catmando for a fully jointed hand carved artist's mannequin
only 1 inch tall. 
2nd place went to Elizabeth McInnes for a lovely little Dik-Dik.
One of the honourable Mention Awards went to Paul Briggs. His scale miniature of the Cutty Sark was mounted on a salvaged piece of the original Cutty Sark making it truly one of a kind.


I did manage to do a bit of shopping too.
Bronze horses from Arte Forge and an Egyptian cat for Hungerford Manor from Neil Carter. Cranberry Glass from Glasscraft 
The dome with the tiny blue tits by Tiny Tales is a particular treasure.

And of course miniature books from Dateman Books, Ellie de Lacey and Miniatuurenboekbinden.

There never seems to be enough time to see everything I want or buy everything I wish had. I guess I will just have to go back next year. LOL

 It was a great trip and a chance to visit Jill and Chris Gabbey in Devon. We also stopped in Petworth after the show and went to Petworth House. Funny it doesn't look anything like my place.


cheers
 Gayle


www.petworthminiatures.com


Saturday, April 15, 2017

Quarter Scale Kit Assembly Techniques

   
It always amazes people how easy it is to do quarter scale kits.
Every show there is always someone who looks at my kits and says "oh I love them but I can't work that small."
Then the next year they come back and say "My friend convinced me that I have to try one."
And then the next show they are there with a list saying " I'm hooked!! This much easier than I thought and it all fits in such a small area." 
I feel like the Quarter Pusher . 'Psst  want to buy a kit?" LOL
 But the fact remains it is easy to do quarter scale. Sometimes, surprisingly easy.

One of the best tools are tweezers. You can hold kit parts, dip them in glue and position the parts all in the same move. You can set your chair in place and move it around with tweezers and then you can add a tiny throw cushion on the chair with the tweezers. Try doing that with 1/12!

Staining the kit pieces is very simple too. Use a touch up stain pen. Most hardware stores now carry marking pens with stain that match their larger cans. Or you can use an alcohol based coloured marker if you would like a blue chair or a faded green cabinet. The all the pens will let the grain of the wood show through. If the kit  pieces are in a panel then stain the entire panel of pieces before you take separate them. Much easier. remember to do both sides.
 If you are painting the piece then do that after it is assembled as the paint is less likely to warp the wood if it is glued together.

 Paint brushes don't have to be 10/0 to paint something quarter scale but they do help sometimes. Another standby is a round toothpick. Once the base coat is on you can add an amazing number of designs with the pointed end of a toothpick dipped in paint. Dots, of course, but also tiny commas and fine lines. Those 3 things can be combined to add gold decorations, flowers, scrolls and almost  any other detail you can imagine.

Most pieces are held in the panel with tiny uncut tabs. Use a sharp craft knife to cut the tab. Press with the knife on the tab and it should POP. If it doesn't turn the piece over and press again.
Don't try to slide the knife along the tab to cut it. That can slip and cut into the piece or tear the wood.

My #1 rule is use wood glue on wood.  You can add a touch of tacky to help it hold quickly but please don't use tacky to build furniture. I know a lot of people say the opposite but Tacky is meant to stay flexible. Chair legs that bend away from the seat won't hold up your little people and are very frustrating to the carpenter.
I have found a new glue called wood glue MAX that works like a tacky glue and sets solidly.

For upholstery, tacky works just fine. The tackier the better. I love The Ultimate by Crafter's Pick. Unfortunately it is getting harder to find but well worth the search. It also works well for holding the furniture in the room. Just a dot on one or two chair legs will hold it in place on the carpet or flooring.

As far as fabric goes, always use natural fabric. No polyester or anything wrinkle free. That is meant to stay flat and is horrible to try to glue on anything small. Cotton or silk will let you drape it and glue with a lot less fighting.

Paper fabric is rather fun to do too. Try this; Print a quilt on regular paper with your printer. Cut it out and then roll it up as if you were making a spit ball. Remember them. I know you 'never' did that is school but I'm sure you saw one once. Un roll your spit ball' and then crumple it up again. Do it a coupe of times until the paper is soft and a but limp. Don't go too far or the printing will wear off. Now you have a nice soft quilt that can be draped and folded to lay over the end of a chair or bed and will have the soft look of fabric.


That's it for now. if you need any help with a technique send me an email and I will try to help.
There is a complete list of my kits  in a pdf file on th lft of the home page on m website.
                                               www.petworthminiatures.com
and the photo gallery there also has photos of rooms and settings with lots of decorating ideas.


Saturday, April 1, 2017

Wandlyn Way Part 1


  I love the Harry Potter movies and Diagon Alley is such a great set. I wanted to do one in quarter scale but it had to be my own so...the Wandlyn Way was born.

The Story of the Wandlyn Way
According to legend the Wandlyn Way was developed by Percival Penrose.
Percival Penrose descended from a long line of wizards in England but he wanted to see more of the world. In 1820 he immigrated to North America and after living in a log cabin for several months he decided that roughing it in the bush was not for him. He purchased a property in a small courtyard in the market area of the new Bytown and built an inn that reminded him of home. The Hole in the Wall was a Tudor styled building and attracted mainly lumberjacks and stonemasons at first but slowly word of his roots spread and those with a magical aptitude started patronizing the pub. As the wizard population increased in this new land he realized that they needed the same special items that had been available in England. Being a shrewd entrepreneur he established the Wandlyn Way in a hidden alley behind his Inn. The
Way quickly became the meeting place for all wizards and the mundane lumber jacks that frequented his pub never noticed the more colourful patrons who slipped out to the outhouse in the back alley and eventually returned laden with miscellaneous mysterious packages.


The Hedge Witch
#1 Wandlyn Way.
Herbalia Gardner~ proprietor
 
A hedge witch from Shropshire opened the first shop in 1825. Geraldine Gardiner delighted in discovering new herbs and fungi in the vast surrounding forests. She had also brought with her seeds and cuttings from many of the plants that had grown in the garden back in England. The shop is now run by her great great great granddaughter Herbalia and continues to supply a wondrous selection of plants and garden necessities.


Leaden Gold Alchemist & Apothecary
The ‘Great’ Leaden Gold prop.
Est. 1828

  Once customers starting wandering into the tiny alley behind the Hole in the Wall, it became clear that there was need for magical supplies and one man appeared from nowhere to fill the need. He introduced himself as the “Great” Leaden Gold, ‘world renowned purveyor of superior sorcery supplies’. No one had ever heard of him but anyone new to town was a welcome diversion.
   His servant was seen late at night unloading heavy sacks from his wagon and it was rumoured that they were actually sacks and sacks of gold coins. Leaden hired the skilled stone masons that were working on the Rideau Canal to build him a fine stone building. He was most definite that the building be strong and able to withstand earthquakes or other strong forces. As soon as it was finished, a steady stream of wagons, caravans and the occasional handcart started appearing in front of the building. Interesting packages and barrels were trundled inside. The shop opened in time for the summer solstice with a wide variety of rare and fascinating chemicals and ingredients for all manner of potions and spells.
   The proprietor perched on a high stool behind the counter and wrote orders into a large red ledger book while his servant ran back and forth and climbed up and down measuring quantities and wrapping packages which he carefully piled on the long counter. Gold gracefully presented the wrapped packages to his customers and gently dropped each payment into a large metal box.
  The first day of business, the line of customers snaked out the door and down the alley. Even the lumberjacks in the bar were amazed at the number of people who immediately headed out to the outhouse behind the pub with barely a nod at those sitting at the pub tables. They soon put it down to a bad case of food poisoning and the cook house next door saw a disturbing drop in their sales for several days.
   By the end of that first day, the shelves were nearly bare and the Leaden Gold Alchemist and Apothecary Shop was an established part of the Wandlyn Way.
   The Great Gold, himself, stood only 4 feet tall but he still aspired to a more impressive appearance. His towering gold hat increased his height to nearly seven feet and a multitude of bells and charms hung on every part of his robes. The noise generated as he jangled and jingled down the alley caught everyone’s attention and they stood aside to see what was causing the commotion. The Great Gold trotted importantly down the open middle of the street bowing and nodding to those lining the Way as if it was his due.  He completely missed the grins and giggles that followed his progress.
   His hulking manservant was truly seven feet tall and usually followed stoically behind the tiny man gathering up any bells or doodads that dropped from the jingling robes and lugging an assortment of bags boxes and barrels for the shop.
Although no one had ever found even one person who had heard of ’The Great Gold’, the wizards of Bytown and the surrounding hills enthusiastically welcomed the amusing little man. They flocked to his shop to purchase their magical supplies, such as dragons blood and toad warts, and they delighted in the strange and wonderful machines he invented in his workshop. The fact that none of them did anything useful did not reduce the pure pleasure of discussing ‘crazy little Gold’s’ latest invention around a pub table during the long winter nights.  The occasional booming explosion or dish that rattled off the shelf only added to the entertainment as far as the community was concerned.
   The lumberjacks put the noise and vibration down to trees falling or work on the canal.  
The shop has changed hands over the years and no longer is owned by the Gold family. In fact Gold himself disappeared not long after the shop opened. His caravan was last seen racing down the valley with his manservant running desperately after it. There were hints that the gold coins used to pay the stonemasons who built the shop and the suppliers who filled it had slowly turned into dull lumps of lead but no one would admit to having been caught in such a scam and only a few strange grey metal souvenirs circulated through the community and eventually found their way into tackle boxes   


Wands & Incantations
TobiasBartholomew prop.
Est. 1828
The castle like edifice of Leaden Gold ~ Alchemist simply cried out for a tower and Tobias Bartholomew soon proposed to add just that adornment. The great houses of parliament boasted such towers and it was easy to convince the stone masons to add a similar smaller structure in the Wandlyn Way.  Tobias thought it was an appropriate shape for a shop that specialized in wands.  The forest that supplied some of the Hedge Witch’s newest botanical experiments also provided an unending variety of wood for creating wands that were particularly attuned to this new wizard world. Strong oak, supple birch, traditional rowan and the new sugar maple as well as heart pine and black walnut all found their way into his workshop where they were transformed into unique wands ready to claim their one soul mate. Tobias was a tiny man himself but he wielded a sturdy oak wand nearly his own size. When he began to carve a wand his talented hands were as delicate as a butterfly and coaxed fine intricate designs from the wood.  Unicorns were plentiful in the wild woods but newer animals also contributed magical cores for the wands. Often the totems of a Native Shaman would appear in the workroom and regally offer a hair, feather or a whisker before vanishing. Mountain cougar, Artic Fox, Black Bear and Eagle slipped into the workroom and offered a unique bond for special wands.  Tobias welcomed them all with a smile. The great polar bear did cause a bit of consternation as he tried to manoeuver in the small shop but he was still very welcome. Inevitably these unexpected additions to the inventory would be just the one required by the next customer and so the magic of the Old World melded into that of this strange new land.
To be continued.........


Saturday, March 11, 2017

Designing Laser Kits

I often get asked how a kit gets designed ; what the process is and where the ideas originate so I thought you might like to see the step by step process.

First something grabs my attention. It may be the need for a new workshop that fits with a Gathering Theme or a piece of furniture to fit a particular room. The Hungerford Manor kits gave me lots of inspiration for elegant furniture and accessories and now the Wandlyn Way wizard shops are taking me in another direction completely. Sometimes a piece of furniture can be adapted by changing the details ; adding stars to a cabinet for a wizard shop for example. But first you have to start with the original piece.
Most of the furniture I do is based on actual full sized furniture. I love the challenge of reducing it from full sized to 1/4 scale and still end up with a kit that won't make you all hate me because it is too complicated to make. It has to be as simple as possible and yet as detailed as possible. That sometimes is frustrating but oh so satisfying when it finally works.
I do a lot of surfing for images on line and in my collection of furniture books for the type of piece I'm thinking of doing.
Then I copy and paste it to my design program. This is the cottage that has been giving me fits for the last month. Very cute but lots of odd angles. I'm determined to beat it into submission eventually.

Most pieces are easier. Here is one of a china cabinet. It has the original photo of the piece and the pieces that I broke it down into. It is designed to have as few pieces as possible but still keep the look of the original. This one is called a South West china cabinet but really that style of furniture is found from the 1700's to modern day so it will fit anywhere. Styles resurface over and over again with just a bit of change to suit the fashion of the day. It may be as simple as changing the colour of the wood to take it from Tudor to 2017. But that is a subject for another day.


Once I think I have figured out the piece it is cut with the laser. That works like a printer as far as my computer is concerned. It "prints" the lines that I draw so I have to make sure everything I want is there and there are no extra left over markings from the designing. The laser is rather fascinating to watch as it picks its way across the board and cuts here and skips there. Very robotic. Depending on complexity of the kit, it can take a minute or two to cut or over an hour.
The first trial of a kit seldom works. It isn't just the parts that have to be designed but the thickness of the wood has to be taken into account and how it assembles. Does this part glue on top of that one or along the edge or between the sides? I have found that designing late at night is a guarantee that nothing will fit together properly.

Once a kit has been tested and works I'm not finished. It also has to have the instructions written and a code number assigned. I have a list but once in a while I'm working on a couple of kits at once and two get assigned the same number or the numbers get switched. That tends to confuse all of us and is a good reason to make sure you specify the code number and the item on an order.
Normally I cut several different kits all at the same time. Whatever fits on the board.  Right now I'm filling up empty holes in my stock drawers ; getting ready for the shows in Montreal and Kensington. My DH has been counting kits and I have been cutting the ones we need. I put as many kits as I can on one board and usually cut  6 of each. The average board takes about 30 to 50 minutes and has 7 or 8 kits so this is a long process. It amazes me that there are over 300 kits in my catalogue. I hate to think how many hours of designing alone that works out to. But I enjoyed every minute. The days of cutting not so much. But writing this blog passes the time. You can't leave a laser running by itself so I have to sit with it all the time. After all it is burning the wood to cut it and could start a fire. Speaking of burning; the laser does give off smoke and smells rather like a wood stove so it has to be well ventilated and that meant cutting a hole in the wall and installing a vent pipe and exhaust system. In our northern climate, cutting a hole in the wall and installing a metal pipe isn't very good for the heating bills but it is better than filling the house with smoke and carbon monoxide.


Once cut, the kit pieces have to be sorted and packaged. Some have printed cardstock parts, no hole bead knobs, upholstery padding or wire bits. They each have instructions and writing those is a whole different challenge. It is amazing how many ways there are to say the same thing and some are easier to understand than others.
I usually sit and watch TV while I pack kits. It gets a bit mind numbing sometimes; 1 wood 1 card 1 bead...1 wood 1 card 1 bead... 1 wood 1 card  ..."Shoot did I remember the bead in the last one??"  and then there is the challenge of trying to keep Harley from running off with anything that drops on the floor. He is still a puppy and everything is a toy.

Here is the final 1/4" scale cabinet that we started with above. I think it turned out pretty well; compared to the original. Now if I could just say the same about that sweet (evil) little cottage.


All the kits, including this Q822 South West/ Georgian/Modern china cabinet  are listed in a pdf catalogue on the left side of the home page of my website. www.petworthminiatures.com

Until next time... Have fun!
Cheers
Gayle

Sunday, March 5, 2017


March 2017
For some reason... maybe procrastination?? my blog has been sitting idle for years. I'm hoping to change that. The last post I wrote was March 2012 so maybe March is my month for writing and I'm on a 5 year plan. Let's hope not.

It is true that March seems to be the month that I get organized for the rest of the year and start  counting kits and replacing stock. I try to get my DH to count kits but he seems to be as bad, or good, at procrastination as I am. I will have to crack the whip soon.  LOL

It is also when I start planning  new projects and building prototypes. My friends keep saying they wish they could see inside my head. Personally I think it would look rather like a squirrels nest; full of miscellaneous parts and with bits and pieces all scrambled in a ball. It certainly feels as if a squirrel lives there much of the time. That squeaky wheel can drive you nuts.

The new Wandlyn Way series is off to a good start and I've been working on the 3rd kit for the street. For those of you who missed seeing the introduction for the kits; The Wandlyn Way is North America's answer to DiagonAlley. If Harry Potter can buy wizard supplies in England then the wizards of North America must have had a place to shop too. First established in a hidden lane off the Byward Market in 1820, the shops have an Old World atmosphere with a New World touch.
 The first shop was the Hedge Witch, a shop for magical gardeners. Here you can buy graveyard dirt, moon flowering water lilies, and all your other gardening needs.


The Alchemist shop is next door and Leaden Gold is a rather interesting alchemist. He arrived suddenly from unknown parts and built a shop to sell all kinds of magical ingredients. He also did rather noisy experiments in the upper room of the building.


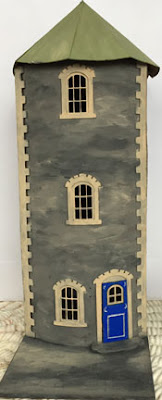
The next shop in the street sells wands and scrolls of incantations. It will be unveiled soon but I can tell you that it is a 3 story tower and would make a nice castle if you aren't into wizards. I'm still working on the interior but I love the curved front.

I'm also try to figure out a workshop for the 2018 Ontario Gathering. I found a wonderful little cottage that I wanted to do in quarter scale. It has turned into a wonder, miserable little pain in the ...
LOL  We have fought it out for a couple of weeks now and I think I am finally winning. It is still a wonderful little cottage bit it wont be a workshop. This is definitely a take your time sort of building and could ever be done in a day. It will make a lovely kit eventually and I hope to show you a completed photo of it soon.
So back to the drawing board for a Gathering workshop. I think I have something easier in mind. But it is so easy to get carried way. I do love details. By The Way the 2018 Gathering is in Gananoque Ontario April 20-22 2018and we are planning a wonderful theme. Stay tuned for more info.


Our next show is April 1 & 2 in Montreal. I hope I will see you there. I plan to bring the Wandlyn Way shops to show off.


I had good intentions to make this newsletter at least quarterly but
you know what they say about good intentions. Here it is March and I’m just
getting down to write the first one for 2012.
It has been a busy year so far and look as if it will stay that way
for the next few months.
There is a list for swaps and conventions and workshops on the
desktop of my computer that just seems to get longer every day and I could swear
that something should have been checked off that list by now but it never seems
to get any shorter. Must be computer gremlins.
I started the year off at Molly Cromwell’s show in Sarasota,
Florida. It was the first show that I have done in
Florida and I have to confess that my DH and I loved the Sarasota
area. We were only there for 4 days but managed a whirlwind tour. As usual,
Molly made all her vendors welcome and the evening spent at her home was a
treat. We also managed a quick tour of the Ringling House and
Museum.
Lots of ornate eye candy and maybe someday a few new 1/4 scale kits
will come out of the photos I took.
If you ever get down to Venice, Fl there is a restaurant called The
Crow’s Nest that as far as my DH is concerned made the whole trip worthwhile.
The seafood was wonderful and our first taste of the Key Lime pie ensured that
we would judge any other version against theirs. Gary firmly believes any trip
should be based on a culinary theme. Restaurants first, museums
second.
The Caribbean Cottage

www.petworthminiatures.com
Portland
The NAME Small Scales convention in Portland Oregon is fast
approaching and I’m so thrilled to be going. I’m teaching the Jolley’s Emporium on Thursday and have been selected for roundtable kits too. With those, and the sales room table, it should be a busy time. I’m also hoping to get to see the Pittock Mansion in Portland. The photos on line are fascinating and I’m trying  to do a 1/4 scale version of one room for the convention display. I just hope I can get it done in time. Wish me luck?
Gary is coming with me and we are taking the Amtrak Lakeshore
Limited train from Syracuse, NY to Chicago and the Empire Builder train from there to Portland. With a couple of hours in Chicago, I’m hoping to see the Thorne rooms. I just hope I don’t get too caught up
looking at the rooms and miss the train.
The two of us will be spending 2 days in very close quarters but we
are still looking forward to the trip. I’ll have to bring some minis to work on.
Pittock Mansion Oval Room